Pages

Pinterest

SavorEat

    • Home

    Four Cheese Pizza, or "Pizza Quattro Formaggi," is a luxurious treat for cheese lovers. With a combination of four different cheeses, this pizza offers a rich and creamy flavor that's irresistible. Whether you're a seasoned cook or a beginner, this recipe will guide you to creating a perfect Four Cheese Pizza at home.

    Ingredients

    For the dough:

    • 2 1/4 cups all-purpose flour
    • 1 teaspoon salt
    • 1 teaspoon sugar
    • 1 tablespoon active dry yeast
    • 3/4 cup warm water
    • 2 tablespoons olive oil

    For the toppings:

    • 1 cup tomato sauce
    • 1 cup shredded mozzarella cheese
    • 1 cup grated Parmesan cheese
    • 1 cup crumbled blue cheese
    • 1 cup shredded provolone cheese
    • 1 teaspoon dried oregano
    • 1 teaspoon dried basil
    • 2 tablespoons extra virgin olive oil

    Instructions

    Preparing the Dough

    1. Activate the Yeast: In a small bowl, combine the warm water and sugar. Sprinkle the yeast over the water and let it sit for about 10 minutes until it becomes frothy.

    2. Mix the Dough: In a large mixing bowl, combine the flour and salt. Make a well in the center and pour in the yeast mixture and olive oil. Stir until the mixture begins to come together.

    3. Knead the Dough: Turn the dough out onto a lightly floured surface and knead for about 10 minutes until smooth and elastic.

    4. Let it Rise: Place the dough in a lightly oiled bowl, cover with a damp cloth, and let it rise in a warm place for about 1-2 hours, or until it has doubled in size.

    Assembling the Pizza

    1. Preheat the Oven: Preheat your oven to 475°F (245°C). If you have a pizza stone, place it in the oven while it preheats.

    2. Shape the Dough: Punch down the dough and turn it out onto a lightly floured surface. Roll or stretch the dough into a 12-inch circle. If you're using a pizza stone, place the dough on a piece of parchment paper for easy transfer.

    3. Add the Sauce: Spread the tomato sauce evenly over the dough, leaving a small border around the edges.

    4. Add the Cheeses: Sprinkle the mozzarella, Parmesan, blue cheese, and provolone evenly over the sauce.

    5. Season and Bake: Sprinkle the dried oregano and basil over the pizza. Drizzle with extra virgin olive oil. Transfer the pizza to the preheated oven (or onto the pizza stone). Bake for about 10-12 minutes, or until the crust is golden and the cheese is bubbling and slightly browned.

    Serving

    Slice the pizza into wedges and serve hot. The blend of different cheeses creates a symphony of flavors that is creamy, tangy, and utterly delicious.

    Tips for the Perfect Four Cheese Pizza

    • Quality Cheese: Use high-quality cheeses for the best flavor. Freshly grated cheese melts better and has a richer taste.
    • Hot Oven: A very hot oven helps achieve that perfect crispy crust.
    • Balance of Flavors: Adjust the amount of blue cheese if you prefer a milder or stronger flavor.

    Enjoy your homemade Four Cheese Pizza with a glass of wine or your favorite beverage. It's perfect for a cozy night in or a special gathering with friends and family.


    If you enjoyed this Pizza recipe, you can click HERE to find more recipes that will help you cook your dishes in a simple and fun way.

    Continue Reading

    Hawaiian Pizza is a delightful twist on the traditional pizza, combining savory and sweet flavors. The combination of ham, pineapple, and cheese creates a unique taste that's both refreshing and satisfying. Here’s how you can make this tropical-inspired pizza at home.

    Ingredients

    For the dough:

    • 2 1/4 cups all-purpose flour
    • 1 teaspoon salt
    • 1 teaspoon sugar
    • 1 tablespoon active dry yeast
    • 3/4 cup warm water
    • 2 tablespoons olive oil

    For the toppings:

    • 1 cup tomato sauce
    • 2 cups shredded mozzarella cheese
    • 1 cup cooked ham, diced
    • 1 cup pineapple chunks (fresh or canned, drained)
    • 1 teaspoon dried oregano
    • 1 teaspoon dried basil
    • 2 tablespoons grated Parmesan cheese
    • 2 tablespoons extra virgin olive oil

    Instructions

    Preparing the Dough

    1. Activate the Yeast: In a small bowl, combine the warm water and sugar. Sprinkle the yeast over the water and let it sit for about 10 minutes until it becomes frothy.

    2. Mix the Dough: In a large mixing bowl, combine the flour and salt. Make a well in the center and pour in the yeast mixture and olive oil. Stir until the mixture begins to come together.

    3. Knead the Dough: Turn the dough out onto a lightly floured surface and knead for about 10 minutes until smooth and elastic.

    4. Let it Rise: Place the dough in a lightly oiled bowl, cover with a damp cloth, and let it rise in a warm place for about 1-2 hours, or until it has doubled in size.

    Assembling the Pizza

    1. Preheat the Oven: Preheat your oven to 475°F (245°C). If you have a pizza stone, place it in the oven while it preheats.

    2. Shape the Dough: Punch down the dough and turn it out onto a lightly floured surface. Roll or stretch the dough into a 12-inch circle. If you're using a pizza stone, place the dough on a piece of parchment paper for easy transfer.

    3. Add the Sauce: Spread the tomato sauce evenly over the dough, leaving a small border around the edges.

    4. Add the Cheese and Toppings: Sprinkle the shredded mozzarella cheese evenly over the sauce. Evenly distribute the diced ham and pineapple chunks on top of the cheese.

    5. Season and Bake: Sprinkle the dried oregano and basil over the pizza. Drizzle with extra virgin olive oil. Transfer the pizza to the preheated oven (or onto the pizza stone). Bake for about 10-12 minutes, or until the crust is golden and the cheese is bubbling and slightly browned.

    6. Finish with Parmesan: Remove the pizza from the oven and immediately sprinkle the grated Parmesan cheese over the top.

    Serving

    Slice the pizza into wedges and serve hot. The delightful mix of sweet pineapple and savory ham, paired with the melty cheese and crispy crust, makes this pizza a favorite for many.

    Tips for the Perfect Hawaiian Pizza

    • Fresh Ingredients: Use fresh pineapple for a juicier, sweeter taste. If using canned pineapple, make sure to drain it well to avoid excess moisture.
    • High-Quality Ham: Opt for a good-quality cooked ham for the best flavor.
    • Hot Oven: A very hot oven helps achieve that perfect crispy crust.

    Enjoy your homemade Hawaiian Pizza with friends and family, and bring a taste of the tropics to your dinner table. Happy cooking!


    If you enjoyed this Pizza recipe, you can click HERE to find more recipes that will help you cook your dishes in a simple and fun way.
    Continue Reading

    Pepperoni pizza is a favorite around the world, known for its savory, spicy slices of pepperoni atop gooey, melted cheese and tangy tomato sauce. Whether you're hosting a pizza night or just craving a slice, this recipe will guide you to making the perfect pepperoni pizza at home.

    Ingredients

    For the dough:

    • 2 1/4 cups all-purpose flour
    • 1 teaspoon salt
    • 1 teaspoon sugar
    • 1 tablespoon active dry yeast
    • 3/4 cup warm water
    • 2 tablespoons olive oil

    For the toppings:

    • 1 cup tomato sauce
    • 2 cups shredded mozzarella cheese
    • 1 cup sliced pepperoni
    • 1 teaspoon dried oregano
    • 1 teaspoon dried basil
    • 2 tablespoons grated Parmesan cheese
    • 2 tablespoons extra virgin olive oil

    Instructions

    Preparing the Dough

    1. Activate the Yeast: In a small bowl, combine the warm water and sugar. Sprinkle the yeast over the water and let it sit for about 10 minutes until it becomes frothy.

    2. Mix the Dough: In a large mixing bowl, combine the flour and salt. Make a well in the center and pour in the yeast mixture and olive oil. Stir until the mixture begins to come together.

    3. Knead the Dough: Turn the dough out onto a lightly floured surface and knead for about 10 minutes until smooth and elastic.

    4. Let it Rise: Place the dough in a lightly oiled bowl, cover with a damp cloth, and let it rise in a warm place for about 1-2 hours, or until it has doubled in size.

    Assembling the Pizza

    1. Preheat the Oven: Preheat your oven to 475°F (245°C). If you have a pizza stone, place it in the oven while it preheats.

    2. Shape the Dough: Punch down the dough and turn it out onto a lightly floured surface. Roll or stretch the dough into a 12-inch circle. If you're using a pizza stone, place the dough on a piece of parchment paper for easy transfer.

    3. Add the Sauce: Spread the tomato sauce evenly over the dough, leaving a small border around the edges.

    4. Add the Cheese and Pepperoni: Sprinkle the shredded mozzarella cheese evenly over the sauce. Arrange the pepperoni slices on top of the cheese.

    5. Season and Bake: Sprinkle the dried oregano and basil over the pizza. Drizzle with extra virgin olive oil. Transfer the pizza to the preheated oven (or onto the pizza stone). Bake for about 10-12 minutes, or until the crust is golden and the cheese is bubbling and slightly browned.

    6. Finish with Parmesan: Remove the pizza from the oven and immediately sprinkle the grated Parmesan cheese over the top.

    Serving

    Slice the pizza into wedges and serve hot. The combination of the crispy crust, spicy pepperoni, and melty cheese is sure to be a hit with everyone.

    Tips for the Perfect Pepperoni Pizza

    • Quality Pepperoni: Choose high-quality pepperoni for the best flavor. Thinly sliced pepperoni works best.
    • Hot Oven: A very hot oven helps achieve that perfect crispy crust.
    • Extra Cheese: For a cheesier pizza, add an extra half-cup of shredded mozzarella.

    Enjoy your homemade Pepperoni Pizza with friends and family, and make every bite count. Happy baking!


    If you enjoyed this Pizza recipe, you can click HERE to find more recipes that will help you cook your dishes in a simple and fun way.

    Continue Reading

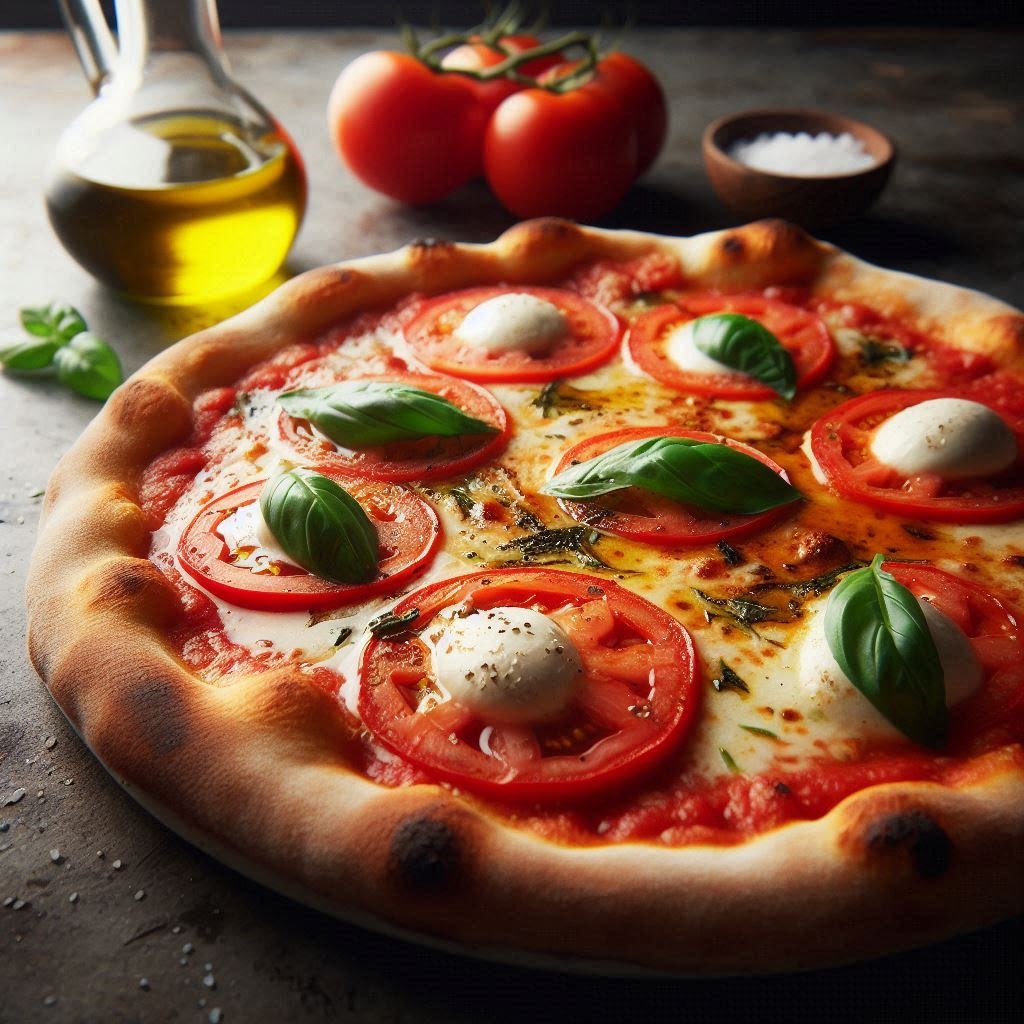
    Pizza Margherita is a timeless Italian classic that combines simplicity with rich flavors. With its origins in Naples, this pizza is beloved for its fresh ingredients and perfect balance of flavors. Here's how you can make this delicious dish at home.

    Ingredients

    For the dough:

    • 2 1/4 cups all-purpose flour
    • 1 teaspoon salt
    • 1 teaspoon sugar
    • 1 tablespoon active dry yeast
    • 3/4 cup warm water
    • 2 tablespoons olive oil

    For the toppings:

    • 1 cup tomato sauce
    • 2 cups fresh mozzarella cheese, sliced
    • 1/2 cup fresh basil leaves
    • 2 tablespoons extra virgin olive oil
    • Salt and pepper to taste

    Instructions

    Preparing the Dough

    1. Activate the Yeast: In a small bowl, combine the warm water and sugar. Sprinkle the yeast over the water and let it sit for about 10 minutes until it becomes frothy.

    2. Mix the Dough: In a large mixing bowl, combine the flour and salt. Make a well in the center and pour in the yeast mixture and olive oil. Stir until the mixture begins to come together.

    3. Knead the Dough: Turn the dough out onto a lightly floured surface and knead for about 10 minutes until smooth and elastic.

    4. Let it Rise: Place the dough in a lightly oiled bowl, cover with a damp cloth, and let it rise in a warm place for about 1-2 hours, or until it has doubled in size.

    Assembling the Pizza

    1. Preheat the Oven: Preheat your oven to 475°F (245°C). If you have a pizza stone, place it in the oven while it preheats.

    2. Shape the Dough: Punch down the dough and turn it out onto a lightly floured surface. Roll or stretch the dough into a 12-inch circle. If you're using a pizza stone, place the dough on a piece of parchment paper for easy transfer.

    3. Add the Sauce: Spread the tomato sauce evenly over the dough, leaving a small border around the edges.

    4. Add the Cheese: Arrange the mozzarella slices evenly over the sauce.

    5. Bake the Pizza: Transfer the pizza to the preheated oven (or onto the pizza stone). Bake for about 10-12 minutes, or until the crust is golden and the cheese is bubbling and slightly browned.

    6. Finish with Basil and Olive Oil: Remove the pizza from the oven and immediately scatter the fresh basil leaves over the top. Drizzle with extra virgin olive oil and season with a pinch of salt and pepper.

    Serving

    Slice the pizza into wedges and serve hot. The combination of the crispy crust, fresh tomato sauce, creamy mozzarella, and fragrant basil creates a perfect bite every time.

    Tips for the Perfect Pizza Margherita

    • Use Fresh Ingredients: Fresh mozzarella, high-quality olive oil, and fresh basil make a big difference in flavor.
    • Don't Overload the Pizza: Less is more when it comes to toppings. This pizza is all about the balance of simple ingredients.
    • Hot Oven: A very hot oven helps achieve that perfect crispy crust.

    Enjoy your homemade Pizza Margherita with a glass of Italian wine or a refreshing drink of your choice. Buon appetito!


    If you enjoyed this Pizza recipe, you can click HERE to find more recipes that will help you cook your dishes in a simple and fun way.

    Continue Reading

    These Keto Grilled Pork Chops with Asparagus are a delicious and satisfying dish that's perfect for those following a keto diet. Tender grilled pork chops paired with flavorful asparagus make for a wholesome and low-carb meal.

    Ingredients

    • 4 pork chops, bone-in or boneless
    • 1 bunch asparagus, trimmed
    • 2 tablespoons olive oil
    • 2 cloves garlic, minced
    • 1 teaspoon dried thyme
    • Salt and pepper, to taste
    • Lemon wedges, for serving (optional)

    Instructions

    1. Prepare the Pork Chops:

      • Preheat the grill to medium-high heat. Pat dry the pork chops and season generously with salt and pepper.
    2. Grill the Pork Chops:

      • Brush the pork chops with olive oil and place them on the preheated grill. Grill for 4-5 minutes per side, or until the internal temperature reaches 145°F (63°C) for medium-rare to medium doneness. Cooking time may vary depending on the thickness of the chops.
    3. Prepare the Asparagus:

      • In a bowl, toss the trimmed asparagus with olive oil, minced garlic, dried thyme, salt, and pepper.
    4. Grill the Asparagus:

      • Place the seasoned asparagus on the grill alongside the pork chops. Grill for 5-7 minutes, turning occasionally, until tender and lightly charred.
    5. Serve:

      • Remove the pork chops and asparagus from the grill. Let the pork chops rest for a few minutes before serving. Serve hot with lemon wedges if desired.

    Tips for Perfect Keto Grilled Pork Chops with Asparagus

    • Marinate Ahead: For extra flavor, marinate the pork chops in olive oil and herbs for 30 minutes before grilling.
    • Vegetable Variation: Substitute asparagus with other keto-friendly vegetables like zucchini or bell peppers.
    • Grill Temperature: Ensure the grill is properly preheated to achieve perfect grill marks and juicy pork chops.

    Conclusion

    Keto Grilled Pork Chops with Asparagus offer a satisfying blend of protein and healthy fats, making them an excellent choice for a keto-friendly dinner. Enjoy the simplicity and deliciousness of this grilled dish!

    Share your experience making Keto Grilled Pork Chops or any variations you try in the comments below. Bon appétit!


    If you enjoyed this Keto recipe, you can click HERE to find more recipes that will help you cook your dishes in a simple and fun way.

    Continue Reading

    This Keto Chicken Curry with Coconut Milk is a rich and creamy dish that's full of aromatic spices and tender chicken, perfect for those following a keto lifestyle.

    Ingredients

    • 1 lb boneless, skinless chicken thighs or breasts, cut into cubes
    • 1 tablespoon coconut oil
    • 1 onion, finely chopped
    • 3 cloves garlic, minced
    • 1 tablespoon ginger, minced
    • 1 tablespoon curry powder
    • 1 teaspoon ground turmeric
    • 1 teaspoon ground cumin
    • 1/2 teaspoon ground coriander
    • 1/4 teaspoon cayenne pepper (optional, adjust to taste)
    • 1 can (14 oz) coconut milk (full-fat)
    • 1 tablespoon tomato paste
    • Salt and pepper, to taste
    • Fresh cilantro, for garnish
    • Cauliflower rice or zucchini noodles, for serving (optional)

    Instructions

    1. Cook Chicken:

      • In a large skillet or pot, heat coconut oil over medium heat. Add chicken cubes and cook until browned on all sides. Remove chicken and set aside.
    2. Sauté Aromatics:

      • In the same skillet, add chopped onion and sauté until translucent. Add minced garlic and ginger, cook for another minute until fragrant.
    3. Add Spices:

      • Stir in curry powder, turmeric, cumin, coriander, and cayenne pepper (if using). Cook for a few minutes to toast the spices.
    4. Simmer with Coconut Milk:

      • Pour in coconut milk and tomato paste, stirring to combine. Bring to a simmer and cook for about 10 minutes, allowing the flavors to meld together.
    5. Return Chicken to Sauce:

      • Add the cooked chicken back to the skillet. Simmer for another 5-7 minutes, or until chicken is cooked through and the sauce has thickened slightly. Season with salt and pepper to taste.
    6. Serve:

      • Garnish with fresh cilantro. Serve hot over cauliflower rice or zucchini noodles if desired.

    Tips for Perfect Keto Chicken Curry with Coconut Milk

    • Vegetable Options: Feel free to add keto-friendly vegetables like bell peppers or spinach.
    • Adjust Spice Level: Increase or decrease cayenne pepper according to your spice preference.
    • Make-Ahead: This curry tastes even better the next day, so it's perfect for meal prepping.

    Conclusion

    Keto Chicken Curry with Coconut Milk is a comforting and flavorful dish that's easy to make and satisfies your cravings while staying within your keto goals. Enjoy the rich blend of spices and creamy coconut milk in every bite!

    Share your experience making Keto Chicken Curry or any variations you try in the comments below. Bon appétit!


    If you enjoyed this Keto recipe, you can click HERE to find more recipes that will help you cook your dishes in a simple and fun way.

    Continue Reading

    These Keto Stuffed Bell Peppers with Ground Beef and Cheese are a delicious and satisfying dish that's perfect for a low-carb diet. Packed with flavorful ground beef, melted cheese, and tender bell peppers, it's a wholesome meal option.

    Ingredients

    • 4 large bell peppers (any color)
    • 1 pound ground beef
    • 1/2 cup onion, diced
    • 2 cloves garlic, minced
    • 1 cup cauliflower rice (optional)
    • 1 cup shredded cheddar cheese, divided
    • 1 teaspoon dried oregano
    • 1 teaspoon ground cumin
    • Salt and pepper, to taste
    • Fresh parsley, for garnish

    Instructions

    1. Prepare the Bell Peppers:

      • Preheat oven to 375°F (190°C). Cut the tops off the bell peppers and remove seeds and membranes. Place them in a baking dish.
    2. Cook the Filling:

      • In a large skillet, cook ground beef over medium-high heat until browned. Add diced onion and minced garlic, cooking until onion is translucent.
    3. Add Seasonings and Cauliflower Rice (Optional):

      • Stir in dried oregano, ground cumin, salt, and pepper. If using cauliflower rice, add it to the skillet and cook for an additional 5 minutes until tender.
    4. Stuff the Bell Peppers:

      • Remove skillet from heat and mix in 1/2 cup shredded cheddar cheese. Spoon the beef mixture evenly into the bell peppers. Top each pepper with the remaining shredded cheddar cheese.
    5. Bake:

      • Cover the baking dish with foil and bake for 25-30 minutes, or until peppers are tender and cheese is melted.
    6. Serve:

      • Garnish with fresh parsley and serve hot.

    Tips for Perfect Keto Stuffed Bell Peppers

    • Vegetable Options: Feel free to customize the filling with spinach, mushrooms, or other keto-friendly vegetables.
    • Make-Ahead: Prepare the stuffed peppers ahead of time and refrigerate until ready to bake.
    • Variations: Substitute ground beef with ground turkey or chicken for a lighter option.

    Conclusion

    Keto Stuffed Bell Peppers with Ground Beef and Cheese are a comforting and flavorful meal that's easy to make and perfect for anyone following a keto lifestyle. Enjoy the hearty combination of beef, cheese, and bell peppers in every bite!

    Share your experience making Keto Stuffed Bell Peppers or any variations you try in the comments below. Bon appétit!


    If you enjoyed this Keto recipe, you can click HERE to find more recipes that will help you cook your dishes in a simple and fun way.

    Continue Reading

    This Greek Salad with Olives and Feta Cheese is a refreshing and healthy dish that fits perfectly into a keto diet. With crisp vegetables, briny olives, and creamy feta cheese, it's a delightful Mediterranean-inspired salad.

    Ingredients

    • 2 cups cherry tomatoes, halved
    • 1 cucumber, diced
    • 1 red bell pepper, diced
    • 1/2 red onion, thinly sliced
    • 1/2 cup Kalamata olives, pitted
    • 1/2 cup crumbled feta cheese
    • 1/4 cup extra virgin olive oil
    • 2 tablespoons red wine vinegar
    • 1 teaspoon dried oregano
    • Salt and pepper, to taste
    • Fresh parsley or basil, for garnish (optional)

    Instructions

    1. Prepare the Salad:

      • In a large bowl, combine cherry tomatoes, cucumber, red bell pepper, red onion, and Kalamata olives.
    2. Make the Dressing:

      • In a small bowl, whisk together olive oil, red wine vinegar, dried oregano, salt, and pepper.
    3. Combine and Toss:

      • Pour the dressing over the salad ingredients and toss gently to coat.
    4. Add Feta Cheese:

      • Sprinkle crumbled feta cheese over the salad and gently toss again.
    5. Serve:

      • Garnish with fresh parsley or basil, if desired. Serve chilled and enjoy!

    Tips for Perfect Greek Salad with Olives and Feta Cheese

    • Variations: Add grilled chicken or shrimp for a protein boost.
    • Storage: Keep the salad and dressing separate if making ahead to maintain freshness.
    • Customize: Adjust the amount of olive oil and vinegar to suit your taste preferences.

    Conclusion

    Greek Salad with Olives and Feta Cheese is not only delicious but also packed with Mediterranean flavors that complement a keto lifestyle. Whether as a side dish or a light meal, this salad is sure to satisfy. Enjoy the fresh taste and health benefits of this classic Greek recipe!

    Share your experience making Greek Salad with Olives and Feta Cheese or any tweaks you try in the comments below. Bon appétit!


    If you enjoyed this Keto recipe, you can click HERE to find more recipes that will help you cook your dishes in a simple and fun way.

    Continue Reading

    This Keto Beef Steak with Sautéed Broccoli combines tender beef steak with flavorful, garlic-infused broccoli for a satisfying low-carb meal. It's perfect for those following a keto diet or anyone looking for a delicious, nutritious dish.

    Ingredients

    • 4 beef steak fillets
    • 2 cups broccoli florets
    • 4 cloves garlic, minced
    • 2 tablespoons butter
    • 2 tablespoons olive oil
    • Salt and pepper, to taste
    • Fresh parsley, for garnish

    Instructions

    1. Prepare the Beef Steak:

      • Season the beef steak fillets with salt and pepper on both sides.
    2. Cook the Steak:

      • Heat 1 tablespoon of olive oil in a skillet over medium-high heat. Add the steak fillets and cook for 3-4 minutes per side for medium-rare, or adjust cooking time according to your preference. Remove from skillet and set aside to rest.
    3. Sauté the Broccoli:

      • In the same skillet, add the remaining olive oil and butter. Add minced garlic and sauté until fragrant, about 1 minute. Add broccoli florets and sauté for 4-5 minutes, or until tender-crisp. Season with salt and pepper to taste.
    4. Serve:

      • Plate the beef steak fillets alongside the sautéed broccoli. Garnish with fresh parsley and serve hot.

    Tips for Perfect Keto Beef Steak with Sautéed Broccoli

    • Steak Thickness: Adjust cooking time based on the thickness of your steak fillets for desired doneness.
    • Garlic Infusion: Infuse extra garlic flavor by adding minced garlic to the butter and olive oil mixture before sautéing the broccoli.
    • Variations: Substitute broccoli with other keto-friendly vegetables like asparagus or zucchini.

    Conclusion

    Keto Beef Steak with Sautéed Broccoli is a flavorful and satisfying dish that's easy to prepare and perfect for a low-carb lifestyle. With its tender beef and nutritious broccoli, it's sure to become a favorite on your keto menu. Enjoy this recipe as a delicious addition to your dinner rotation!

    Share your experience making Keto Beef Steak with Sautéed Broccoli or any variations you try in the comments below. Bon appétit!


    If you enjoyed this Keto recipe, you can click HERE to find more recipes that will help you cook your dishes in a simple and fun way.

    Continue Reading

    This Keto Bone Broth Vegetable Soup is a comforting and nourishing dish that's perfect for anyone following a keto diet. Packed with hearty vegetables and the goodness of bone broth, it's a flavorful meal option for cooler days.

    Ingredients

    • 4 cups bone broth (chicken or beef)
    • 1 cup cauliflower florets
    • 1 cup broccoli florets
    • 1 cup sliced mushrooms
    • 1/2 cup diced carrots
    • 1/2 cup diced celery
    • 2 cloves garlic, minced
    • 2 tablespoons olive oil
    • Salt and pepper, to taste
    • Fresh herbs (parsley or thyme), for garnish

    Instructions

    1. Prepare the Vegetables:

      • In a large pot or Dutch oven, heat olive oil over medium heat. Add minced garlic and sauté until fragrant.
    2. Add Vegetables and Broth:

      • Add cauliflower, broccoli, mushrooms, carrots, and celery to the pot. Sauté for 5-7 minutes until vegetables begin to soften.
    3. Pour in Bone Broth:

      • Pour in bone broth, season with salt and pepper to taste. Bring to a boil, then reduce heat and simmer for 15-20 minutes, or until vegetables are tender.
    4. Serve:

      • Ladle the soup into bowls, garnish with fresh herbs if desired, and serve hot.

    Tips for Perfect Keto Bone Broth Vegetable Soup

    • Bone Broth: Use homemade or store-bought bone broth to enhance the flavor and nutritional benefits.
    • Vegetable Variations: Feel free to add or substitute vegetables like spinach, kale, or bell peppers based on your preference.
    • Enhance Flavor: Add a dash of lemon juice or a sprinkle of grated Parmesan cheese before serving for an extra flavor boost.

    Conclusion

    Keto Bone Broth Vegetable Soup is a wholesome and delicious option for those looking to enjoy a nourishing meal while staying within their keto goals. With its nutrient-rich ingredients and comforting warmth, it's a soup that satisfies both taste and health. Enjoy this recipe as a satisfying addition to your keto meal plan!

    Share your experience making Keto Bone Broth Vegetable Soup or any adjustments you try in the comments below. Bon appétit!


    If you enjoyed this Keto recipe, you can click HERE to find more recipes that will help you cook your dishes in a simple and fun way.

    Continue Reading

    These Keto Stuffed Chicken Breasts with Spinach and Feta Cheese are a delicious and satisfying dish that's perfect for a low-carb dinner. Tender chicken breasts are filled with a flavorful mixture of spinach, creamy feta cheese, and herbs, making it a delightful choice for any keto meal plan.

    Ingredients

    • 4 boneless, skinless chicken breasts
    • 1 cup fresh spinach, chopped
    • 1/2 cup crumbled feta cheese
    • 2 cloves garlic, minced
    • 1 tablespoon olive oil
    • 1 teaspoon dried oregano
    • Salt and pepper, to taste
    • Toothpicks or kitchen twine

    Instructions

    1. Prepare the Chicken:

      • Preheat your oven to 375°F (190°C). Butterfly each chicken breast by cutting horizontally through the center, but not all the way through, to create a pocket.
    2. Make the Filling:

      • In a skillet, heat olive oil over medium heat. Add minced garlic and chopped spinach, cooking until spinach is wilted. Remove from heat and stir in crumbled feta cheese, dried oregano, salt, and pepper.
    3. Stuff the Chicken:

      • Spoon the spinach and feta mixture evenly into each chicken breast pocket. Secure the openings with toothpicks or tie with kitchen twine to hold the filling inside.
    4. Cook the Chicken:

      • Place the stuffed chicken breasts in a baking dish and bake for 25-30 minutes, or until the chicken is cooked through and reaches an internal temperature of 165°F (74°C).
    5. Serve:

      • Remove toothpicks or twine before serving. Optionally, garnish with fresh herbs and serve hot with a side of roasted vegetables or a crisp salad.

    Tips for Perfect Keto Stuffed Chicken Breasts

    • Variations: Substitute feta cheese with goat cheese or mozzarella for different flavor profiles.
    • Side Dish: Pair with cauliflower rice or zucchini noodles for a complete keto-friendly meal.
    • Make Ahead: Prepare the stuffed chicken breasts in advance and refrigerate until ready to bake.

    Conclusion

    Keto Stuffed Chicken Breasts with Spinach and Feta Cheese are a flavorful and nutritious option for anyone following a keto diet. With its cheesy filling and tender chicken, this dish is sure to become a favorite. Enjoy this recipe for a satisfying dinner that's both delicious and low-carb!

    Share your experience making Keto Stuffed Chicken Breasts or any adjustments you try in the comments below. Bon appétit!


    If you enjoyed this Keto recipe, you can click HERE to find more recipes that will help you cook your dishes in a simple and fun way.

    Continue Reading

    Baked Broccoli with Cheese is a delightful keto-friendly side dish that combines tender broccoli florets with melted cheese for a delicious and comforting dish. Here’s how to make it at home.

    Ingredients

    • 1 lb broccoli florets
    • 1/2 cup shredded cheddar cheese
    • 1/4 cup grated Parmesan cheese
    • 2 tablespoons olive oil
    • 2 cloves garlic, minced
    • Salt and pepper, to taste

    Instructions

    1. Preheat the Oven:

      • Preheat your oven to 400°F (200°C).
    2. Prepare the Broccoli:

      • Wash and trim the broccoli florets into bite-sized pieces.
    3. Combine Ingredients:

      • In a mixing bowl, toss the broccoli florets with olive oil, minced garlic, salt, and pepper until evenly coated.
    4. Bake the Broccoli:

      • Spread the broccoli on a baking sheet lined with parchment paper or foil. Bake in the preheated oven for 15-20 minutes, or until the broccoli is tender and slightly crispy around the edges.
    5. Add Cheese:

      • Remove the broccoli from the oven and sprinkle shredded cheddar cheese and grated Parmesan cheese evenly over the top.
    6. Bake Again:

      • Return the baking sheet to the oven and bake for an additional 5-7 minutes, or until the cheese is melted and bubbly.
    7. Serve:

      • Remove from the oven and serve hot as a side dish or a light keto-friendly meal.

    Tips for Perfect Baked Broccoli with Cheese

    • Cheese Variations: Feel free to use your favorite cheese blend or experiment with different cheeses like mozzarella or Gruyère.
    • Crispy Texture: For extra crispiness, broil the broccoli for 1-2 minutes after adding the cheese until golden brown.
    • Customization: Add crispy bacon bits or a sprinkle of red pepper flakes for additional flavor and texture.

    Conclusion

    Baked Broccoli with Cheese is a simple yet flavorful dish that’s perfect for anyone following a keto diet or looking for a tasty vegetable side. With its cheesy goodness and tender broccoli, it’s sure to become a favorite at your table. Enjoy this recipe as a delicious addition to any meal!

    Share your experience making Baked Broccoli with Cheese or any variations you try in the comments below. Bon appétit!


    If you enjoyed this Keto recipe, you can click HERE to find more recipes that will help you cook your dishes in a simple and fun way.

    Continue Reading

    Turkey Burgers with Avocado are a delicious and healthy option for a keto-friendly meal. This recipe combines lean ground turkey with creamy avocado for juicy burgers that are packed with flavor. Here’s how to make them at home.

    Ingredients

    • 1 lb ground turkey
    • 1 avocado, mashed
    • 1/4 cup almond flour
    • 1/4 cup grated Parmesan cheese
    • 1 clove garlic, minced
    • 1 tablespoon Worcestershire sauce
    • 1 teaspoon dried oregano
    • Salt and pepper, to taste
    • Olive oil, for cooking

    Instructions

    1. Prepare the Turkey Burger Mixture:

      • In a large bowl, combine ground turkey, mashed avocado, almond flour, grated Parmesan cheese, minced garlic, Worcestershire sauce, dried oregano, salt, and pepper. Mix until well combined.
    2. Form the Burger Patties:

      • Divide the turkey mixture into 4 equal portions. Shape each portion into a patty, about 1/2 inch thick.
    3. Cook the Turkey Burgers:

      • Heat olive oil in a skillet or grill pan over medium heat. Add the turkey burgers and cook for 4-5 minutes per side, or until cooked through and no longer pink in the center.
    4. Serve:

      • Remove the turkey burgers from the heat and let them rest for a few minutes. Serve hot, optionally with lettuce wraps or keto-friendly buns and your favorite toppings.

    Tips for Perfect Turkey Burgers with Avocado

    • Avocado Tip: To prevent browning, mix the mashed avocado with a squeeze of lemon or lime juice before adding it to the turkey mixture.
    • Grill Option: You can also grill these turkey burgers outdoors for a smoky flavor.
    • Topping Ideas: Consider topping your turkey burgers with sliced avocado, lettuce, tomato, and a dollop of keto-friendly mayonnaise.

    Conclusion

    Turkey Burgers with Avocado are a satisfying and nutritious option for those following a keto diet. With lean protein from turkey and healthy fats from avocado, they make a delicious meal any day of the week. Enjoy these flavorful burgers for a keto-friendly twist on a classic favorite!

    Share your experience making Turkey Burgers with Avocado or any variations you try in the comments below. Bon appétit!


    If you enjoyed this Keto recipe, you can click HERE to find more recipes that will help you cook your dishes in a simple and fun way.

    Continue Reading

    Baked Salmon with Asparagus is a healthy and delicious dish that's perfect for a keto-friendly meal. This recipe combines tender salmon fillets with nutritious asparagus, seasoned with herbs and lemon for a burst of flavor. Here’s how to make it at home.

    Ingredients

    • 2 salmon fillets
    • 1 bunch asparagus, ends trimmed
    • 2 tablespoons olive oil
    • 2 cloves garlic, minced
    • 1 teaspoon dried dill (or herb of choice)
    • Salt and pepper, to taste
    • Lemon slices, for garnish

    Instructions

    1. Preheat the Oven:

      • Preheat your oven to 400°F (200°C).
    2. Prepare the Salmon and Asparagus:

      • Place the salmon fillets on a baking sheet lined with parchment paper or foil. Arrange the trimmed asparagus around the salmon.
    3. Seasoning:

      • Drizzle olive oil over the salmon and asparagus. Sprinkle minced garlic, dried dill, salt, and pepper evenly over both the salmon and asparagus.
    4. Bake:

      • Bake in the preheated oven for 12-15 minutes, or until the salmon is cooked through and flakes easily with a fork.
    5. Serve:

      • Remove from the oven and garnish with lemon slices. Serve hot, optionally with a side of cauliflower rice or a mixed green salad.

    Tips for Perfect Baked Salmon with Asparagus

    • Salmon Doneness: Salmon is cooked when it reaches an internal temperature of 145°F (63°C) or flakes easily with a fork.
    • Variations: Substitute dill with your favorite herbs like thyme or rosemary for different flavor profiles.
    • Sheet Pan Method: For easy cleanup, use a sheet pan lined with parchment paper or foil.

    Conclusion

    Baked Salmon with Asparagus is a quick and nutritious dish that's perfect for a keto diet. With its flavorful salmon and tender asparagus, it’s a satisfying meal that’s also easy to prepare. Enjoy this recipe for a healthy dinner option!

    Share your experience making Baked Salmon with Asparagus or any adjustments you try in the comments below. Bon appétit!


    If you enjoyed this Keto recipe, you can click HERE to find more recipes that will help you cook your dishes in a simple and fun way.

    Continue Reading

    Grilled Chicken Caesar Salad is a classic dish that combines crisp romaine lettuce, tender grilled chicken, crunchy croutons, and a creamy Caesar dressing. It's a satisfying meal that's perfect for lunch or dinner. Here’s how to make it at home.

    Ingredients

    For the Grilled Chicken:

    • 2 boneless, skinless chicken breasts
    • 1 tablespoon olive oil
    • 1 teaspoon garlic powder
    • Salt and pepper, to taste

    For the Caesar Salad:

    • 1 head of romaine lettuce, chopped
    • 1 cup croutons
    • 1/2 cup grated Parmesan cheese
    • Caesar dressing (homemade or store-bought)

    For the Caesar Dressing (if making homemade):

    • 1/2 cup mayonnaise
    • 1/4 cup grated Parmesan cheese
    • 2 tablespoons lemon juice
    • 1 tablespoon Dijon mustard
    • 1 clove garlic, minced
    • Salt and pepper, to taste

    Instructions

    1. Prepare the Grilled Chicken:

      • Preheat the grill or grill pan over medium-high heat.
      • Rub the chicken breasts with olive oil, garlic powder, salt, and pepper.
      • Grill the chicken for 6-7 minutes per side, or until fully cooked (internal temperature of 165°F or 74°C). Remove from heat and let rest for 5 minutes before slicing.
    2. Make the Caesar Dressing (if making homemade):

      • In a small bowl, whisk together mayonnaise, grated Parmesan cheese, lemon juice, Dijon mustard, minced garlic, salt, and pepper until smooth and well combined. Adjust seasoning to taste.
    3. Assemble the Salad:

      • In a large salad bowl, combine chopped romaine lettuce, croutons, and grated Parmesan cheese.
      • Add sliced grilled chicken on top of the salad.
    4. Serve:

      • Drizzle Caesar dressing over the salad, tossing gently to coat evenly.
      • Serve immediately, garnished with additional Parmesan cheese and croutons if desired.

    Tips for Perfect Grilled Chicken Caesar Salad

    • Grilled Chicken: For extra flavor, marinate the chicken in Caesar dressing before grilling.
    • Homemade Croutons: Make your own croutons by tossing cubed bread with olive oil, garlic powder, and dried herbs, then baking until golden brown.
    • Vegetarian Option: Substitute grilled chicken with grilled tofu or chickpeas for a vegetarian version.

    Conclusion

    Grilled Chicken Caesar Salad is a delicious and satisfying meal that's easy to prepare at home. With its crunchy lettuce, juicy grilled chicken, and creamy dressing, it’s sure to become a favorite. Enjoy this classic salad for a flavorful lunch or dinner option!

    Feel free to share your experience making Grilled Chicken Caesar Salad or any variations you try in the comments below. Bon appétit!


    If you enjoyed this Keto recipe, you can click HERE to find more recipes that will help you cook your dishes in a simple and fun way.

    Continue Reading

    Looking for a delicious and keto-friendly breakfast option? These scrambled eggs with avocado and spinach are packed with nutrients and flavor, making them the perfect way to start your day on a healthy note.

    Ingredients

    • 4 large eggs
    • 1/4 cup spinach, chopped
    • 1/2 avocado, diced
    • 2 tablespoons heavy cream
    • Salt and pepper, to taste
    • 1 tablespoon olive oil or butter

    Instructions

    1. Prepare the Ingredients:

      • In a bowl, whisk together the eggs, heavy cream, salt, and pepper until well combined. Set aside.
      • Chop the spinach and dice the avocado.
    2. Cook the Spinach:

      • Heat olive oil or butter in a non-stick skillet over medium heat. Add the chopped spinach and sauté for 1-2 minutes until wilted.
    3. Scramble the Eggs:

      • Pour the egg mixture into the skillet with the spinach. Gently stir with a spatula, scraping the sides and bottom of the skillet as the eggs begin to set.
    4. Add the Avocado:

      • When the eggs are almost cooked to your desired consistency, add the diced avocado to the skillet. Continue to cook for another 1-2 minutes until the avocado is warmed through.
    5. Serve:

      • Remove the skillet from heat and transfer the scrambled eggs with avocado and spinach to a plate. Garnish with additional salt and pepper if needed.

    Tips for Perfect Keto Scrambled Eggs

    • Creaminess: The heavy cream adds richness to the eggs and helps keep them creamy.
    • Variations: Feel free to add shredded cheese or a sprinkle of your favorite herbs for extra flavor.
    • Serve with: Enjoy these scrambled eggs with a side of bacon or keto-friendly toast for a complete breakfast.

    Conclusion

    These Keto Scrambled Eggs with Avocado and Spinach are not only keto-friendly but also quick and easy to make. Packed with protein, healthy fats, and fiber, they'll keep you feeling full and satisfied all morning long. Try this recipe for a delicious and nutritious breakfast option!

    Share your experience making this dish or any variations you try in the comments below. Enjoy your keto journey!


    If you enjoyed this Keto recipe, you can click HERE to find more recipes that will help you cook your dishes in a simple and fun way.

    Continue Reading

    Parmigiana di Melanzane, or Eggplant Parmesan, is a classic Italian dish that combines layers of fried eggplant with tomato sauce and cheese, baked to perfection. It's hearty, comforting, and bursting with flavor. Here’s how you can make this delicious dish at home.

    Ingredients

    • 2 large eggplants, sliced into 1/4-inch rounds
    • Salt, for sweating the eggplant
    • 1 cup all-purpose flour
    • 4 large eggs, beaten
    • 2 cups breadcrumbs
    • 1 cup grated Parmesan cheese, divided
    • 2 cups marinara sauce (homemade or store-bought)
    • 1 cup shredded mozzarella cheese
    • Fresh basil leaves, for garnish
    • Olive oil, for frying
    • Salt and pepper, to taste

    Instructions

    1. Prepare the Eggplant:

      • Place the eggplant slices in a colander and sprinkle generously with salt. Let them sit for about 30 minutes to draw out bitterness. Rinse the eggplant slices thoroughly and pat them dry with paper towels.
    2. Coat and Fry the Eggplant:

      • Set up a breading station with three shallow bowls: one with flour, one with beaten eggs, and one with breadcrumbs mixed with 1/2 cup of grated Parmesan cheese.
      • Dredge each eggplant slice in flour, dip in beaten eggs, and coat evenly with the breadcrumb mixture.
      • In a large skillet, heat olive oil over medium-high heat. Fry the eggplant slices in batches until golden brown on both sides, about 3-4 minutes per side. Transfer to a paper towel-lined plate to drain excess oil.
    3. Assemble the Parmigiana:

      • Preheat your oven to 375°F (190°C). Spread a thin layer of marinara sauce on the bottom of a baking dish.
      • Arrange a layer of fried eggplant slices over the sauce, slightly overlapping. Spoon more marinara sauce over the eggplant slices, then sprinkle with shredded mozzarella cheese and some grated Parmesan cheese. Repeat layers, ending with a final layer of sauce and cheese on top.
    4. Bake the Parmigiana:

      • Cover the baking dish with aluminum foil and bake in the preheated oven for 30 minutes. Remove the foil and bake for an additional 10-15 minutes, or until the cheese is melted and bubbly.
    5. Serve:

      • Let the Parmigiana di Melanzane rest for a few minutes before serving. Garnish with fresh basil leaves and additional grated Parmesan cheese, if desired.

    Tips for Perfect Parmigiana di Melanzane

    • Sweat the Eggplant: Salting and sweating the eggplant slices before frying helps remove bitterness and excess moisture.
    • Consistent Slicing: Try to slice the eggplant rounds evenly for even cooking.
    • Homemade Marinara Sauce: For the best flavor, consider using homemade marinara sauce, but store-bought works well too.

    Conclusion

    Parmigiana di Melanzane is a beloved Italian dish that makes a satisfying main course or a delightful side dish. With its crispy fried eggplant, layers of marinara sauce, and gooey melted cheese, it's sure to become a favorite in your home. Enjoy this comforting recipe with family and friends!

    Feel free to share your experience making Parmigiana di Melanzane or any variations you try in the comments below. Buon appetito!


    If you enjoyed this Italian recipe, you can click HERE to find more recipes that will help you cook your dishes in a simple and fun way.

    Continue Reading

    Polenta is a classic Italian dish made from cornmeal that's versatile, comforting, and incredibly satisfying. Whether served creamy and smooth or allowed to set and then grilled or fried, polenta makes a delicious base for a variety of toppings and sauces. Here’s a simple recipe to make creamy polenta at home.

    Ingredients

    • 1 cup polenta (coarse cornmeal)
    • 4 cups water or broth (vegetable or chicken)
    • 1 teaspoon salt
    • 1/2 cup grated Parmesan cheese (optional)
    • 2 tablespoons unsalted butter (optional)
    • Freshly ground black pepper, to taste

    Instructions

    1. Cook the Polenta:

      • In a large saucepan, bring the water or broth to a boil. Add the salt.
      • Gradually whisk in the polenta in a steady stream to prevent clumping.
    2. Simmer the Polenta:

      • Reduce the heat to low and simmer the polenta, stirring frequently with a wooden spoon or whisk to prevent it from sticking to the bottom of the pan. Cook for about 30-40 minutes or until the polenta is thick and creamy.
    3. Add Butter and Cheese (Optional):

      • If using, stir in the butter and grated Parmesan cheese until melted and well combined. This adds richness and enhances the flavor of the polenta. Season with black pepper to taste.
    4. Serve:

      • Remove the polenta from the heat and let it rest for a few minutes before serving. Serve warm as a side dish or as a base for various toppings such as sautéed mushrooms, marinara sauce, or grilled vegetables.

    Tips for Perfect Polenta

    • Use Coarse Polenta: Coarse polenta gives a better texture and mouthfeel compared to fine cornmeal.
    • Stir Frequently: Stirring prevents lumps and ensures even cooking.
    • Adjust Consistency: If the polenta becomes too thick, you can thin it out with a little more water or broth.

    Variations

    • Grilled Polenta: Pour cooked polenta into a greased baking dish and let it set. Cut into squares or rounds and grill until crispy on the outside.
    • Creamy Polenta: For a creamier texture, use more liquid and cook for a longer time, stirring occasionally.

    Conclusion

    Polenta is a wonderful dish that can be enjoyed in various ways, from creamy and comforting to crispy and grilled. This versatile cornmeal dish is sure to please everyone at the table. Try this simple recipe and explore the delicious possibilities of polenta in your kitchen!

    Feel free to share your favorite polenta recipes or tips in the comments below. Buon appetito!


    If you enjoyed this Italian recipe, you can click HERE to find more recipes that will help you cook your dishes in a simple and fun way.

    Continue Reading

    Ravioli is a traditional Italian pasta filled with a variety of delicious fillings. Making ravioli from scratch may seem daunting, but it’s a rewarding process that results in a delicious and impressive dish. Here’s a step-by-step guide to making homemade ravioli with a classic ricotta and spinach filling.

    Ingredients

    For the Pasta Dough:

    • 2 cups all-purpose flour
    • 3 large eggs
    • 1 tablespoon olive oil
    • 1/2 teaspoon salt

    For the Filling:

    • 1 cup ricotta cheese
    • 1 cup fresh spinach, cooked and chopped
    • 1/2 cup grated Parmesan cheese
    • 1 large egg yolk
    • Salt and freshly ground black pepper to taste
    • 1/4 teaspoon nutmeg (optional)

    For the Sauce:

    • 4 tablespoons unsalted butter
    • 6-8 fresh sage leaves
    • Salt and freshly ground black pepper to taste
    • Grated Parmesan cheese for serving

    Instructions

    1. Make the Pasta Dough:

      • On a clean work surface, mound the flour and create a well in the center. Crack the eggs into the well, add the olive oil and salt. Using a fork, gradually mix the flour into the eggs until a dough begins to form.
      • Knead the dough for about 10 minutes until it becomes smooth and elastic. If the dough is too sticky, add a little more flour. If it’s too dry, add a small amount of water. Wrap the dough in plastic wrap and let it rest for at least 30 minutes at room temperature.
    2. Prepare the Filling:

      • In a medium bowl, combine the ricotta cheese, chopped spinach, Parmesan cheese, egg yolk, salt, pepper, and nutmeg (if using). Mix until well combined. Set aside.
    3. Roll Out the Dough:

      • Divide the dough into four pieces. Working with one piece at a time (keeping the others covered), roll out the dough using a pasta machine or a rolling pin until it is very thin, about 1/16 inch thick.
    4. Assemble the Ravioli:

      • Lay one sheet of pasta on a lightly floured surface. Place small mounds (about 1 teaspoon) of filling evenly spaced about 2 inches apart on the dough. Brush a little water around each mound of filling to help seal the ravioli.
      • Lay a second sheet of pasta over the first, pressing around the mounds to seal. Use a ravioli cutter or a knife to cut out the individual ravioli. Make sure the edges are well sealed to prevent the filling from leaking out during cooking.
    5. Cook the Ravioli:

      • Bring a large pot of salted water to a boil. Carefully add the ravioli and cook for 3-4 minutes, or until they float to the surface. Remove with a slotted spoon and drain.
    6. Make the Sauce:

      • In a large skillet, melt the butter over medium heat. Add the sage leaves and cook until the butter is golden brown and fragrant. Season with salt and pepper.
    7. Serve:

      • Toss the cooked ravioli gently in the butter and sage sauce. Serve immediately, topped with grated Parmesan cheese.

    Tips for Perfect Ravioli

    • Don’t Overfill: Overfilling can cause the ravioli to burst during cooking. Use about 1 teaspoon of filling per ravioli.
    • Seal Well: Make sure the edges are sealed properly to prevent the filling from leaking out.
    • Cook in Batches: Cook the ravioli in batches to avoid overcrowding the pot, which can cause them to stick together.

    Conclusion

    Homemade ravioli is a delicious and impressive dish that’s worth the effort. With its tender pasta and flavorful filling, it’s perfect for a special dinner or a fun cooking project. Try this recipe and enjoy the authentic taste of homemade ravioli!

    Feel free to share your own tips or variations in the comments below. Buon appetito!

    If you enjoyed this Italian recipe, you can click HERE to find more recipes that will help you cook your dishes in a simple and fun way.

    Continue Reading

    Bruschetta is a traditional Italian appetizer that’s simple to make yet bursting with fresh flavors. Made with ripe tomatoes, fresh basil, garlic, and olive oil on toasted bread, it's a perfect starter for any meal or a delicious snack. Here’s how you can make classic Bruschetta at home.

    Ingredients

    • 1 baguette or rustic Italian bread, sliced into 1/2-inch thick slices
    • 4 ripe tomatoes, diced
    • 2 cloves garlic, minced
    • 1/4 cup fresh basil leaves, chopped
    • 1/4 cup extra virgin olive oil
    • 1 tablespoon balsamic vinegar (optional)
    • Salt and freshly ground black pepper to taste
    • 1 clove garlic, halved (for rubbing on the bread)
    • Extra virgin olive oil for brushing the bread

    Instructions

    1. Prepare the Tomato Topping:

      • In a medium bowl, combine the diced tomatoes, minced garlic, chopped basil, 1/4 cup of extra virgin olive oil, and balsamic vinegar if using. Season with salt and freshly ground black pepper to taste. Let the mixture sit for at least 15 minutes to allow the flavors to meld.
    2. Toast the Bread:

      • Preheat your oven to 400°F (200°C). Arrange the bread slices on a baking sheet and brush each slice with extra virgin olive oil. Bake for 8-10 minutes or until the bread is golden and crispy. Alternatively, you can toast the bread on a grill or stovetop grill pan.
    3. Rub with Garlic:

      • While the bread is still warm, rub each slice with the cut side of a halved garlic clove. This adds a subtle garlic flavor to the bread.
    4. Assemble the Bruschetta:

      • Spoon the tomato mixture onto each toasted bread slice. Make sure to include some of the juice from the tomato mixture, as this enhances the flavor.
    5. Serve:

      • Arrange the bruschetta on a serving platter and drizzle with a little extra olive oil if desired. Serve immediately while the bread is still warm and crisp.

    Tips for Perfect Bruschetta

    • Use Fresh Ingredients: Fresh, ripe tomatoes and good-quality olive oil make a big difference in flavor.
    • Don’t Overload the Bread: While the tomato mixture is delicious, too much can make the bread soggy. Spoon just enough to cover each slice without drenching it.
    • Serve Immediately: Bruschetta is best enjoyed right after it’s assembled to keep the bread crispy and the toppings fresh.

    Conclusion

    Bruschetta is a delightful and easy-to-make appetizer that brings the flavors of Italy to your table. With its combination of crispy bread and fresh, flavorful toppings, it's sure to be a hit at any gathering. Try this classic recipe and enjoy the simple, delicious taste of Bruschetta!

    Feel free to share your own tips or variations in the comments below. Buon appetito!

    If you enjoyed this Italian recipe, you can click HERE to find more recipes that will help you cook your dishes in a simple and fun way.

    Continue Reading

    Osso Buco, which translates to "bone with a hole," is a traditional Italian dish made with braised veal shanks. This rich and flavorful dish is often served with gremolata and a side of risotto or polenta. Here’s how you can make a delicious Osso Buco at home.

    Ingredients

    • 4 veal shanks, each about 1 1/2 inches thick
    • Salt and freshly ground black pepper
    • 1/4 cup all-purpose flour
    • 1/4 cup olive oil
    • 1 medium onion, finely chopped
    • 1 medium carrot, finely chopped
    • 1 celery stalk, finely chopped
    • 3 cloves garlic, minced
    • 1 cup dry white wine
    • 1 cup beef or veal broth
    • 1 can (14.5 oz) diced tomatoes, undrained
    • 1 teaspoon dried thyme
    • 1 teaspoon dried rosemary
    • 1 bay leaf
    • 2 tablespoons tomato paste
    • Zest of 1 lemon
    • 2 tablespoons chopped fresh parsley

    Instructions

    1. Prepare the Veal Shanks:

      • Pat the veal shanks dry with paper towels and season them generously with salt and pepper. Dredge the shanks in flour, shaking off any excess.
    2. Brown the Veal Shanks:

      • In a large, heavy-bottomed pot or Dutch oven, heat the olive oil over medium-high heat. Add the veal shanks and brown them on all sides, about 3-4 minutes per side. Remove the shanks from the pot and set aside.
    3. Sauté the Vegetables:

      • In the same pot, add the chopped onion, carrot, and celery. Cook until the vegetables are softened and lightly browned, about 5-7 minutes. Add the minced garlic and cook for an additional 1 minute.
    4. Deglaze with Wine:

      • Pour in the white wine and bring to a boil, scraping up any browned bits from the bottom of the pot. Let the wine reduce by half, about 2-3 minutes.
    5. Add the Remaining Ingredients:

      • Stir in the beef or veal broth, diced tomatoes, thyme, rosemary, bay leaf, and tomato paste. Return the veal shanks to the pot, making sure they are submerged in the liquid. Bring the mixture to a simmer.
    6. Braise the Veal Shanks:

      • Cover the pot and transfer it to a preheated oven at 350°F (175°C). Braise the veal shanks for 1 1/2 to 2 hours, or until the meat is tender and falling off the bone. Check occasionally and add more broth if necessary.
    7. Prepare the Gremolata:

      • In a small bowl, combine the lemon zest and chopped parsley. This will be used as a garnish for the Osso Buco.
    8. Serve:

      • Remove the pot from the oven and transfer the veal shanks to a serving platter. Spoon the sauce and vegetables over the top. Sprinkle with the gremolata before serving.

    Tips for Perfect Osso Buco

    • Choose Good Quality Veal Shanks: Look for shanks that are cut thick and have a good amount of marrow in the center.
    • Slow and Low Cooking: Braising the shanks slowly in the oven ensures they become tender and flavorful.
    • Gremolata: The fresh, zesty gremolata adds a wonderful contrast to the rich and savory Osso Buco.

    Conclusion

    Osso Buco is a classic Italian dish that brings a touch of elegance to any dinner table. With its tender braised veal and flavorful sauce, it’s sure to impress. Serve it with risotto, polenta, or mashed potatoes for a complete meal. Enjoy making and savoring this delightful recipe!

    Feel free to share your own tips or variations in the comments below. Buon appetito!

    If you enjoyed this Italian recipe, you can click HERE to find more recipes that will help you cook your dishes in a simple and fun way.

    Continue Reading
    Newer
    Stories
    Older
    Stories

    Labels

    • Air Fryer
    • Asian
    • Bread
    • Easy
    • Gluten Free
    • Healthy
    • Italian
    • Keto
    • Mediterranean
    • Pizza
    • Vegan

    Follow Us

    • pinterest

    Popular Posts

    • Spicy Pizza Diavola Recipe
    • Delicious Pizza Prosciutto e Rucola Recipe
    • Crispy Air Fryer Chickpeas Recipe
    • Crispy Air Fryer Fish Fillets Recipe

    Created with by BeautyTemplates | Distributed By Gooyaabi Templates

    Back to top